Quickstart
This guide walks through a complete RUBAT Studio session — from launching the application to monitoring and recording ultrasonic data in the field.
The interface is organised into logical panels. Following them from top to bottom ensures a stable, repeatable workflow.
1. Device Panel — Select & Probe
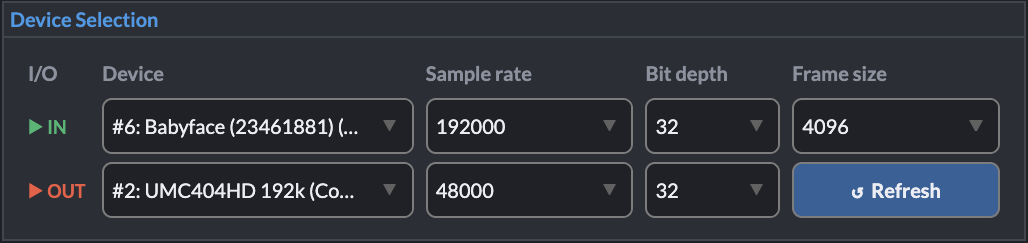
Purpose: Select input/output hardware and configure sampling parameters.
Recommended workflow
- Click ↺ Refresh to detect connected audio devices.
- Select your Input Device (e.g., multi-channel USB interface).
- Select your Output Device (optional; required for monitoring).
- Choose:
- Sample rate (e.g., 192000 Hz for ultrasonic recording)
- Frame size (buffer)
- Bit depth (if available)
When a device is selected, RUBAT probes it and logs its capabilities.
✔ Successful probe → channel selection becomes available
✖ Probe failure → check hardware connection and supported sample rates
Important: Once you press START, device controls are locked to prevent mid-stream reconfiguration.
2. Channel Selection Panel
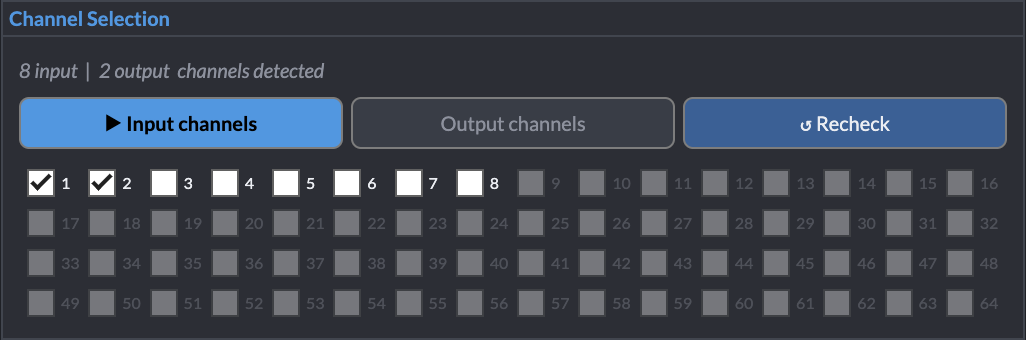
Purpose: Choose which channels to record and/or monitor.
- Input channels are displayed in a scrollable grid.
- Enable only the channels required for your experiment.
- Output channel selection determines routing for monitoring.
For large devices (e.g., 64 channels), scrolling keeps the interface manageable.
3. Monitoring Panel — Passthrough & Heterodyne
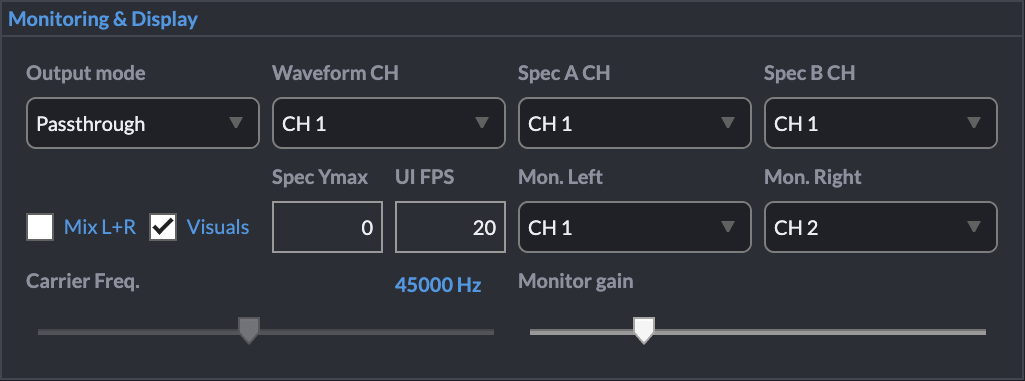
Purpose: Control real-time listening.
RUBAT supports three monitoring states:
- Off — No live output
- Passthrough — Direct audible monitoring
- Heterodyne — Ultrasonic → audible translation
Heterodyne processing runs in real time and does not affect the recorded WAV file.
Adjust:
- Carrier frequency (e.g., 40–50 kHz)
- Monitoring gain
- Channel routing
4. Waveform View
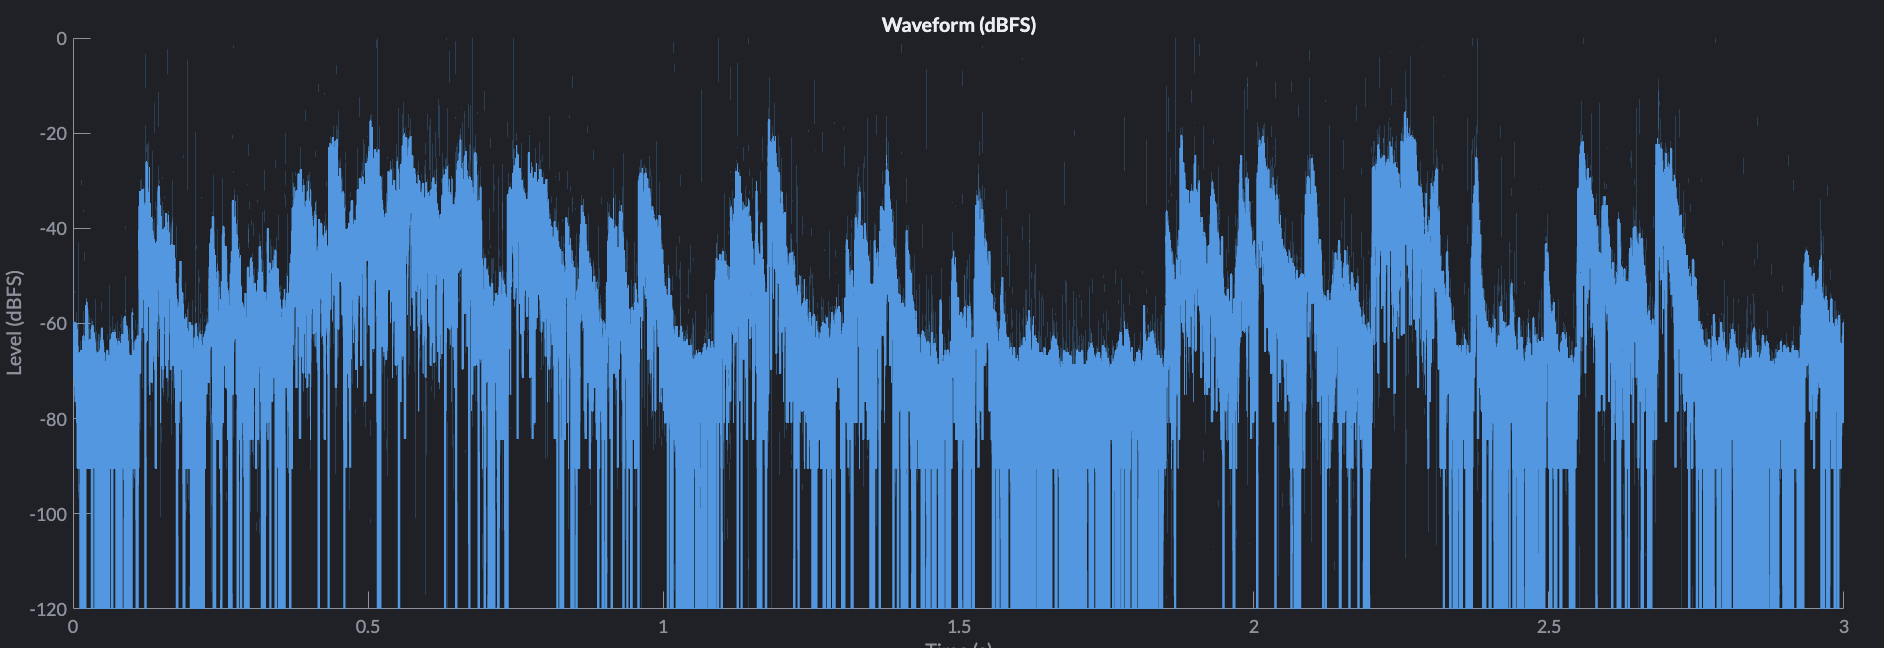
Purpose: Inspect amplitude over time.
Two display modes are available:
- Relative dB (default)
- Calibrated dB SPL (if calibration factor provided)
Entering a calibration factor (Pa per digital unit) converts values to:
dB SPL re 20 µPa
This enables physically meaningful amplitude comparison across sessions and devices.
5. Spectrogram View
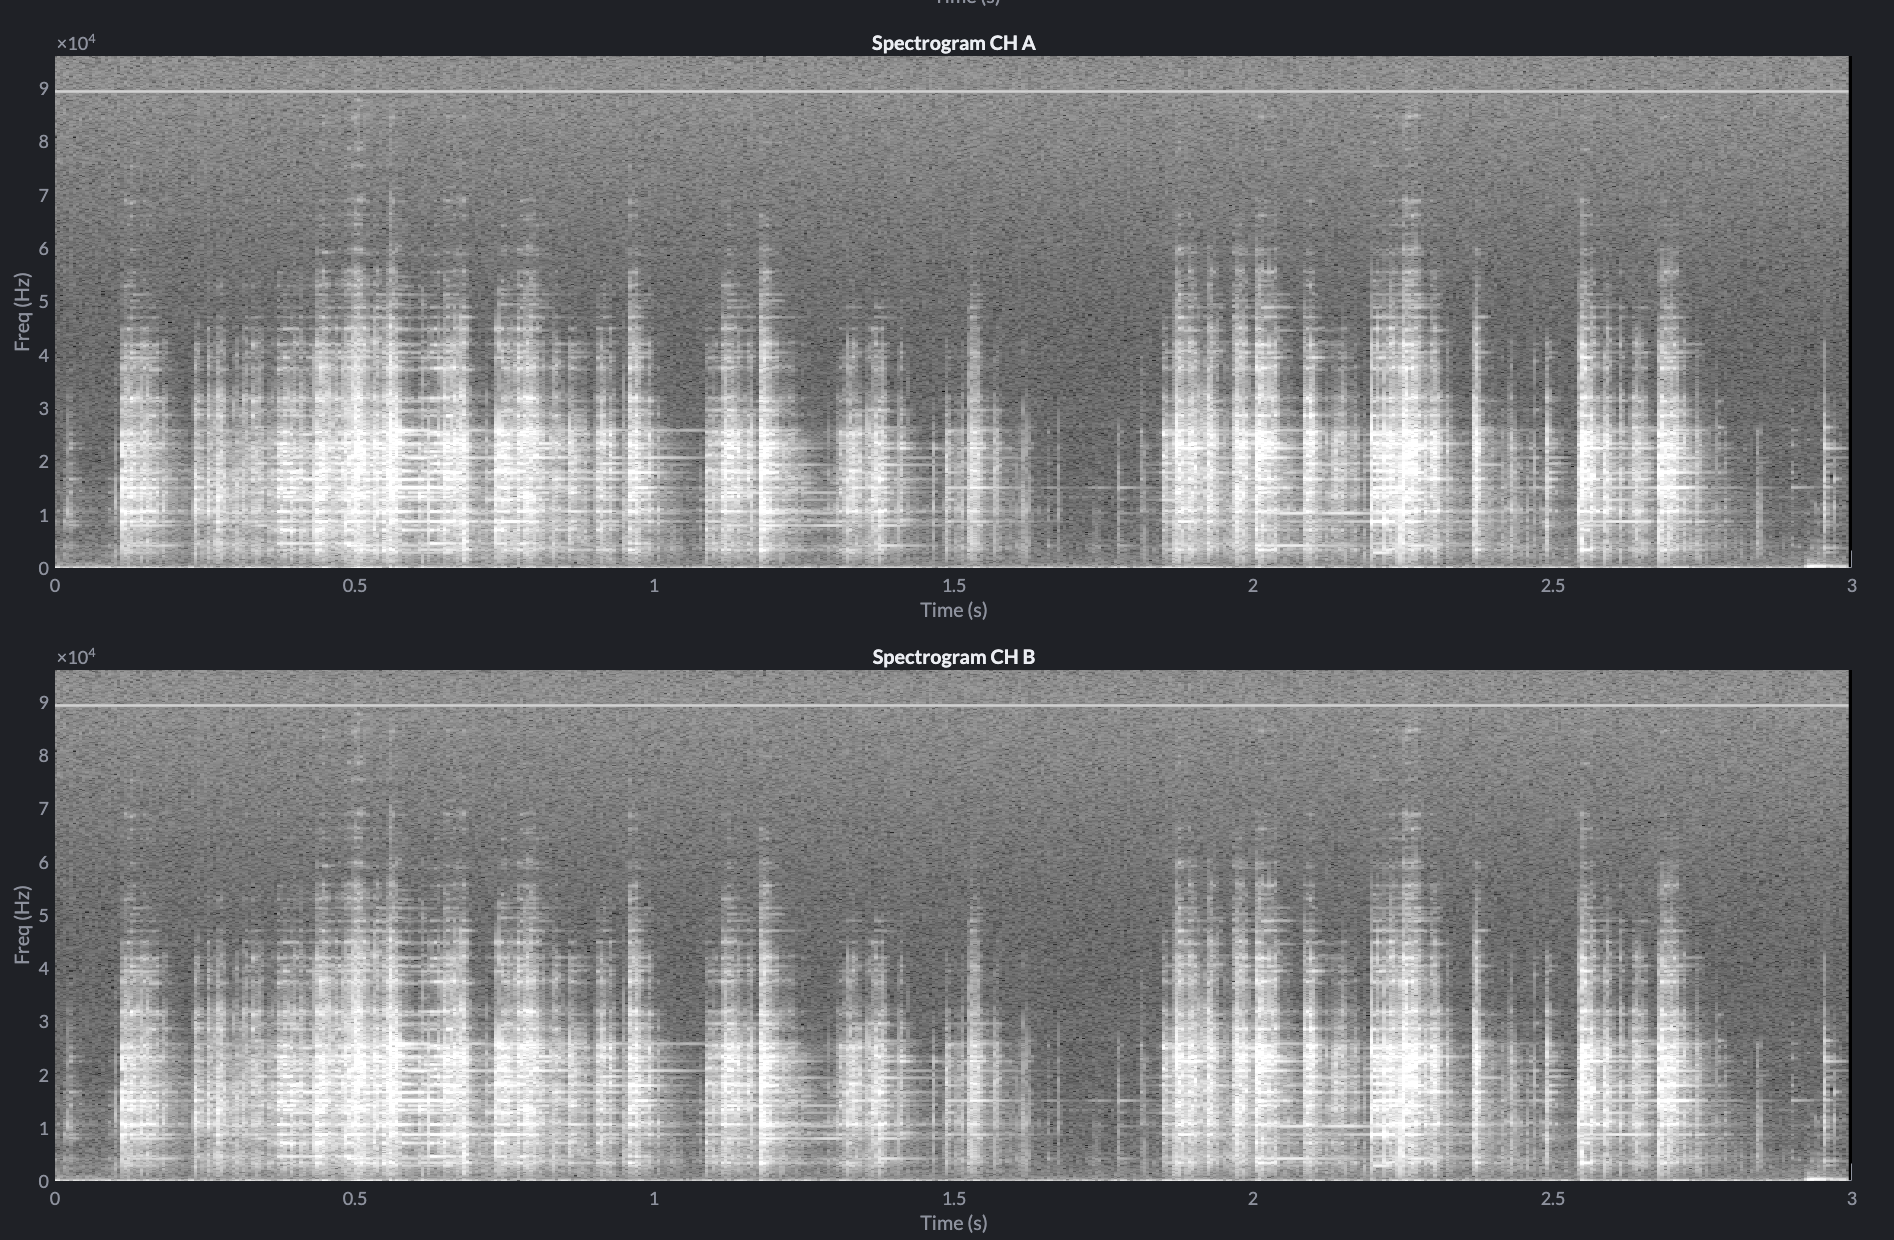
Purpose: Visualise frequency content in real time.
Use the spectrogram to:
- Identify bat call structure
- Evaluate signal-to-noise ratio
- Confirm ultrasonic bandwidth capture
Energy is mapped for high field legibility.
6. Start Streaming
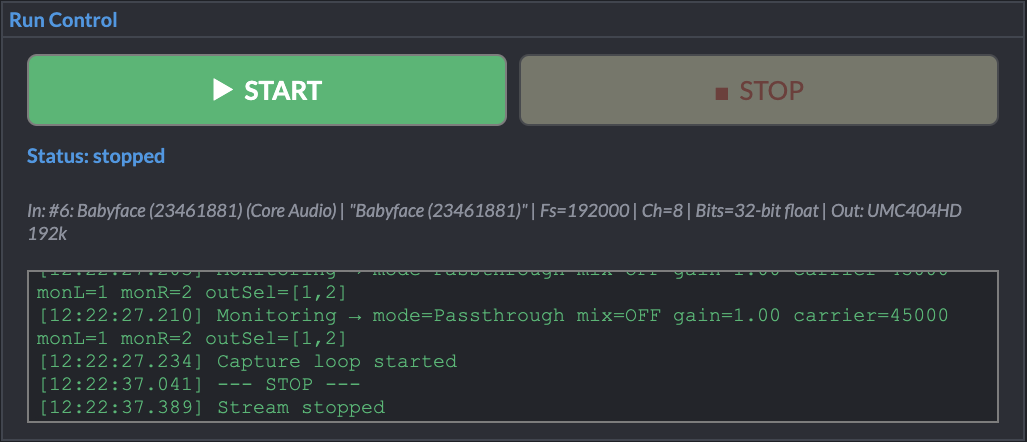
After configuration:
- Press START
- Devices open
- Visuals activate
- Monitoring begins (if enabled)
The status line confirms sampling rate and streaming state.
7. Recording Modes

RUBAT supports three recording modes:
A. Continuous
Best for long unattended sessions.
Recording begins immediately and continues until manually stopped.
B. Tap (Ring Buffer)
Captures what just happened.
Configure:
- Pre-trigger window
- Post-trigger window
Press Tap Record during streaming to save pre + post audio.
C. Auto
Threshold-triggered capture.
Set:
- Detection threshold
- Pre/Post duration
- Required peak count
When threshold conditions are met, RUBAT saves a clip automatically.
Ideal for unattended bat activity monitoring.
8. Logging Panel

Every critical event is logged:
- Device probes
- Sample rate selection
- Channel changes
- Monitoring mode changes
- Recording start/stop
- Auto triggers
Logs allow full session reconstruction — essential for reproducible research.
Typical Field Workflow
- Launch RUBAT
- Refresh devices
- Select input/output
- Verify probe success
- Choose channels
- Press START
- Enable monitoring (if required)
- Record (Continuous / Tap / Auto)
- Monitor logs
- Press STOP before changing devices
Practical Advice
- Always confirm sample rate compatibility.
- Keep monitoring gain moderate.
- Use calibration for publishable amplitude data.
- Review logs before closing.
You are now ready to deploy RUBAT Studio confidently in laboratory or field environments.